Creating tools
Superface offers a web based tool builder that allows you to:
- Create new tools and use cases you require using Open API Specifications.
Access the Authoring Hub by clicking on Create Tools in your Account menu, or by heading to https://pod.superface.ai/authoring.
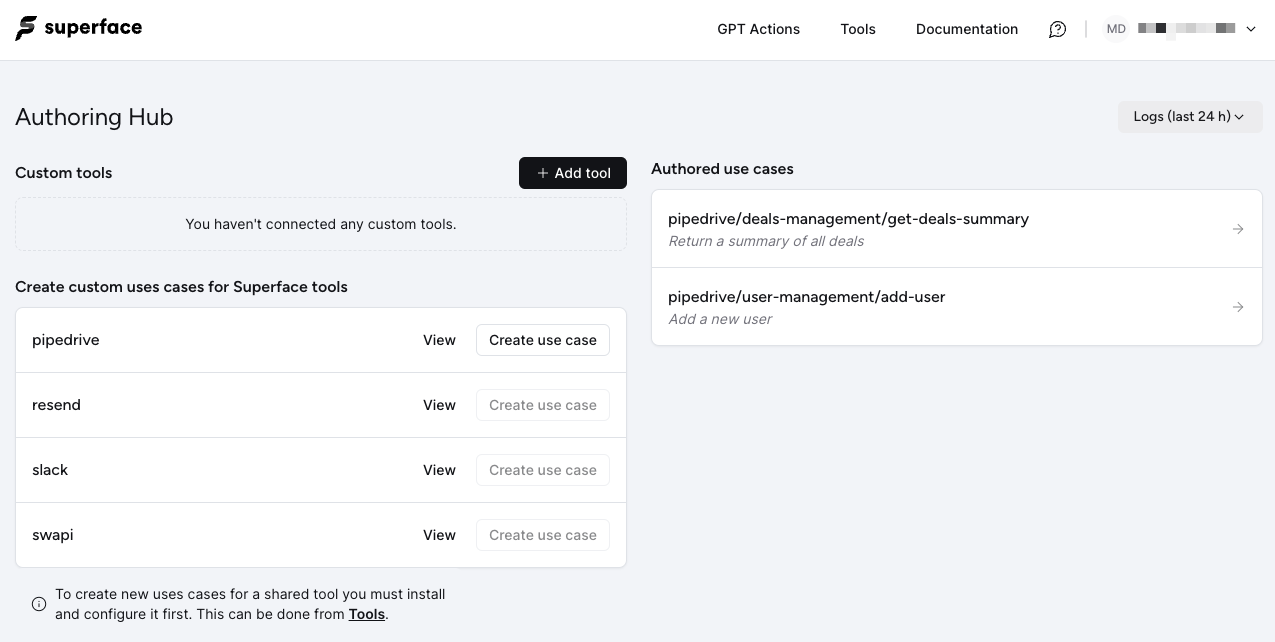
Add a new use case/tool
To add a new tool to Superface you will need the a URL for, or a copy of, the Open API Specification for the API of the service you want to connect to.
Step 1: Upload documentation
Start by clicking on + Add tool, a popup will appear and you can either paste an Open API Specification, or provide a URL for it (URLs for documentation hosted by Readme.io will also be accepted here).
Remember, only Open API Specification documentation is supported at this time. URLs for standard API documentation pages will not work.
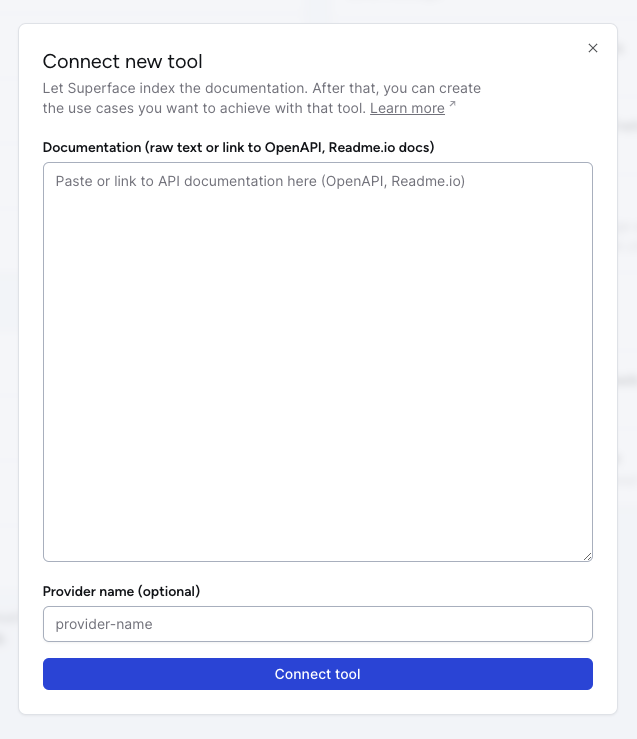
You don't have to provide a name, however if you want control over the naming you can provide one. Typically the name should be for the service you are creating a tool for (eg. electricity-maps, hubspot, my-company-api).
Clicking Connect tool will index the Open API Specification and get it ready for you to make a tool with. You will see the progress on your screen as well as any errors that may occur.
Step 2: Check the provider
Once indexing is complete you will be redirected to a page similar to the one below.
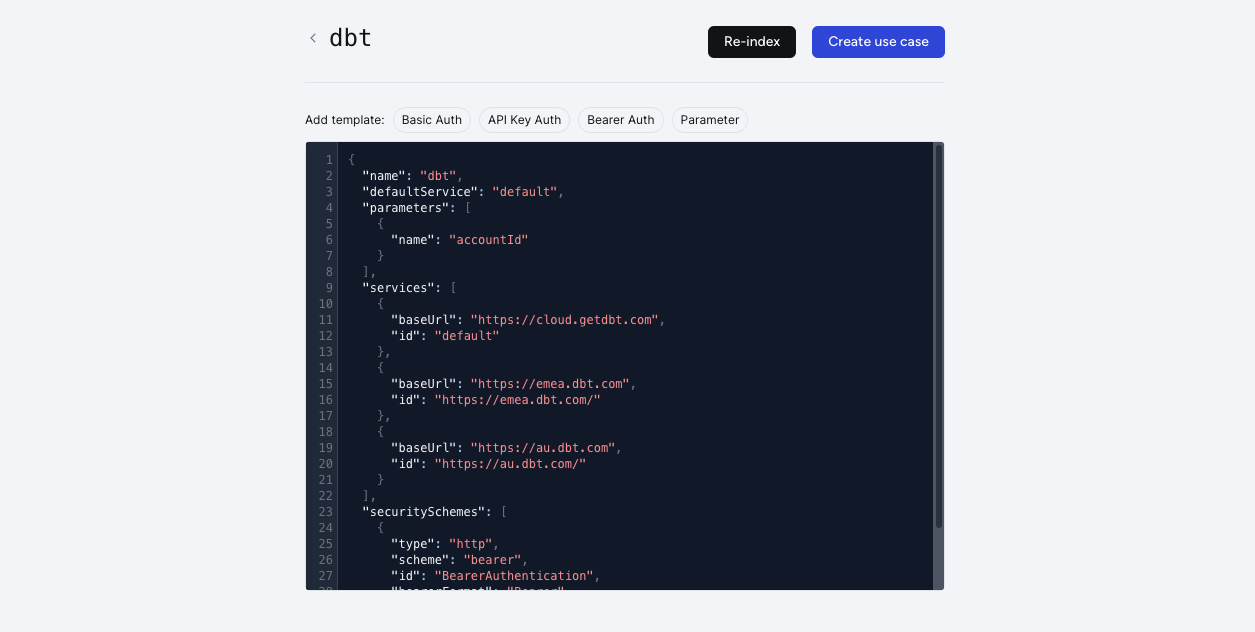
You can check the setup for the Provider by looking at the JSON output. It outlines:
- The name of the service
- The base URL of the API to connect to
- The security scheme required to connect to the API
- Any additional parameters that are required
If you think anything is missing, you can add the elements you need by using the shortcut templates above the box.
![]()
If everything looks correct, it's time to create your use case by clicking Create use case.
Video Overview
Step 3: Create a use case
Before defining your use case, you must install the provider for the tool. You can do this by clicking on Install. Once complete, you can proceed with writing your use case prompt.
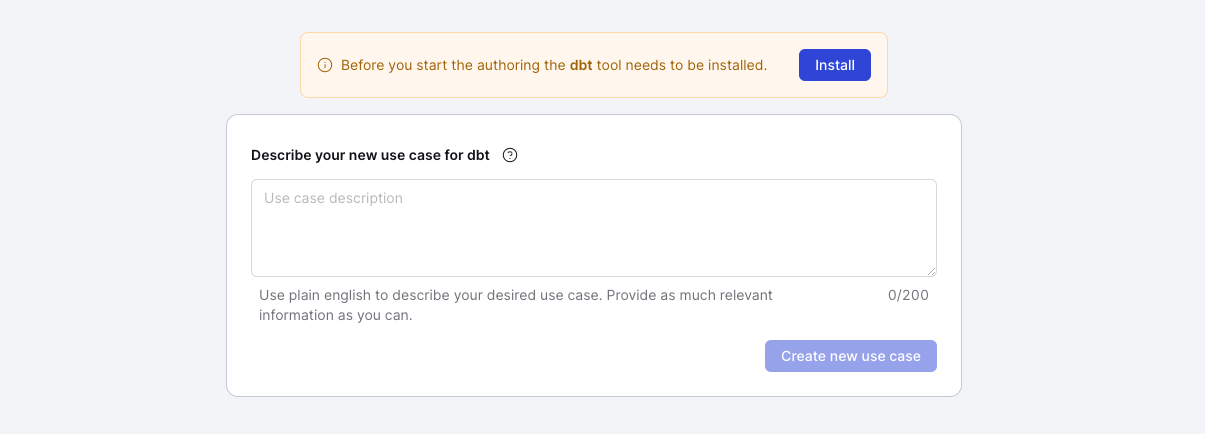
Next, define what the action for your tool should take by writing it out as natural language. For example, with this dbt tool, we want to invite new users to our account:
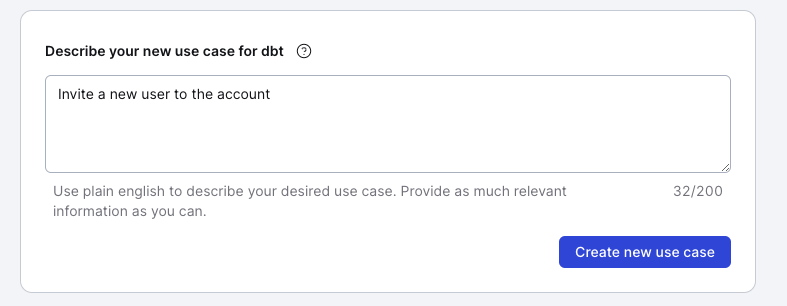
Click Create new use case to continue.
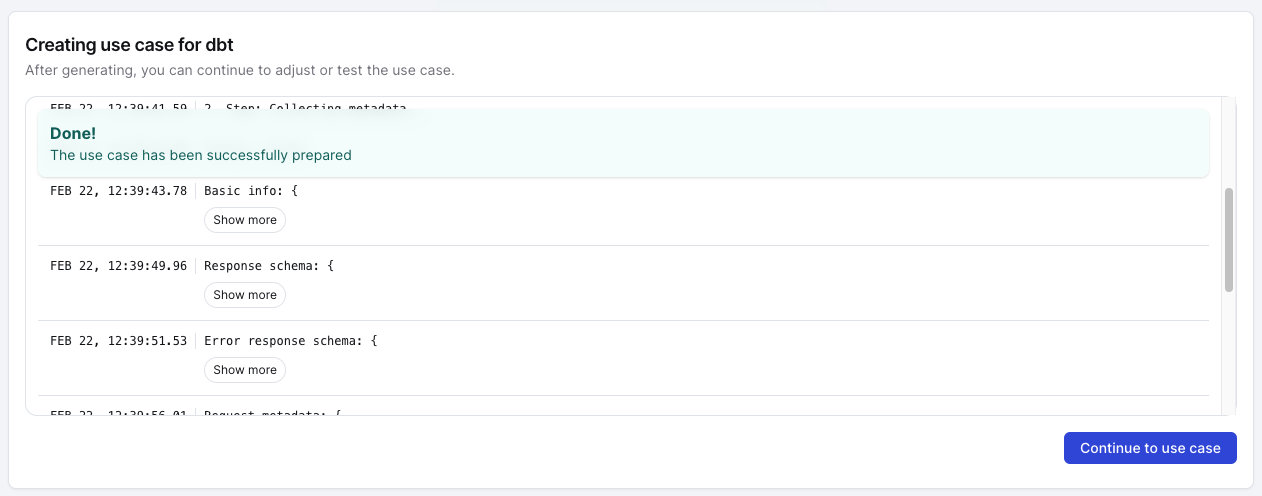
Superface will then determine how to achieve your use case using the documentation you provided earlier.
Video Overview
Step 4: Test and edit
After Superface determines what is required by the API to achieve your use case, you will see a page that looks similar to the one below.
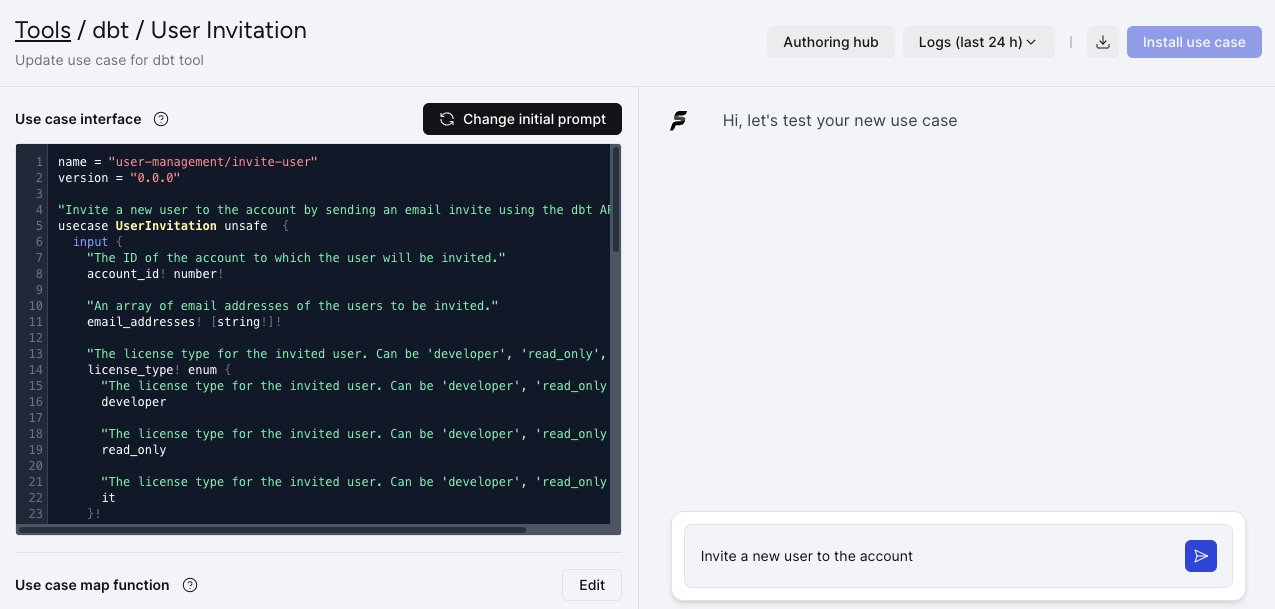
There are three areas on this page:
The use case interface defines the expected inputs that are needed to make your use case possible, as well as what a successful response will look like. This is determined from the documentation you provided.
The chat window on the right is pre-populated with your requested use case prompt. You can test it directly from here to see if you get the response you are looking for.
First, test your prompt to see what you get.
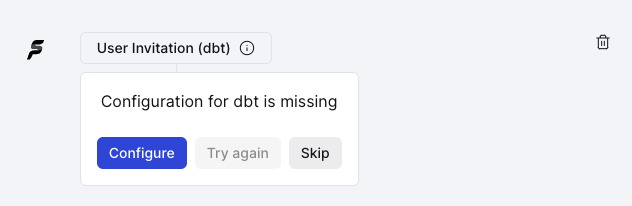
In order to complete requests with your tool, Superface needs the correct authorization. If this is not already set up, you will be asked to configure it. Click on Configure to enter the API credentials.
If you are happy with the output from your prompt, you can move on to installing it.
If you think your prompt can do better, you can choose to Change the inital prompt and provide greater specificity.
Video Overview
Step 5: Install your tool
To install your tool click on Install use case. A modal will appear with the files that are going to be installed on your account. This is for information only.

Superface now has everything it needs to provide the capability you requested.
Click on Install use case again to add it to your list of tools.