Let's get started
After creating your Superface account, you will be directed to your GPT Actions configuration page.
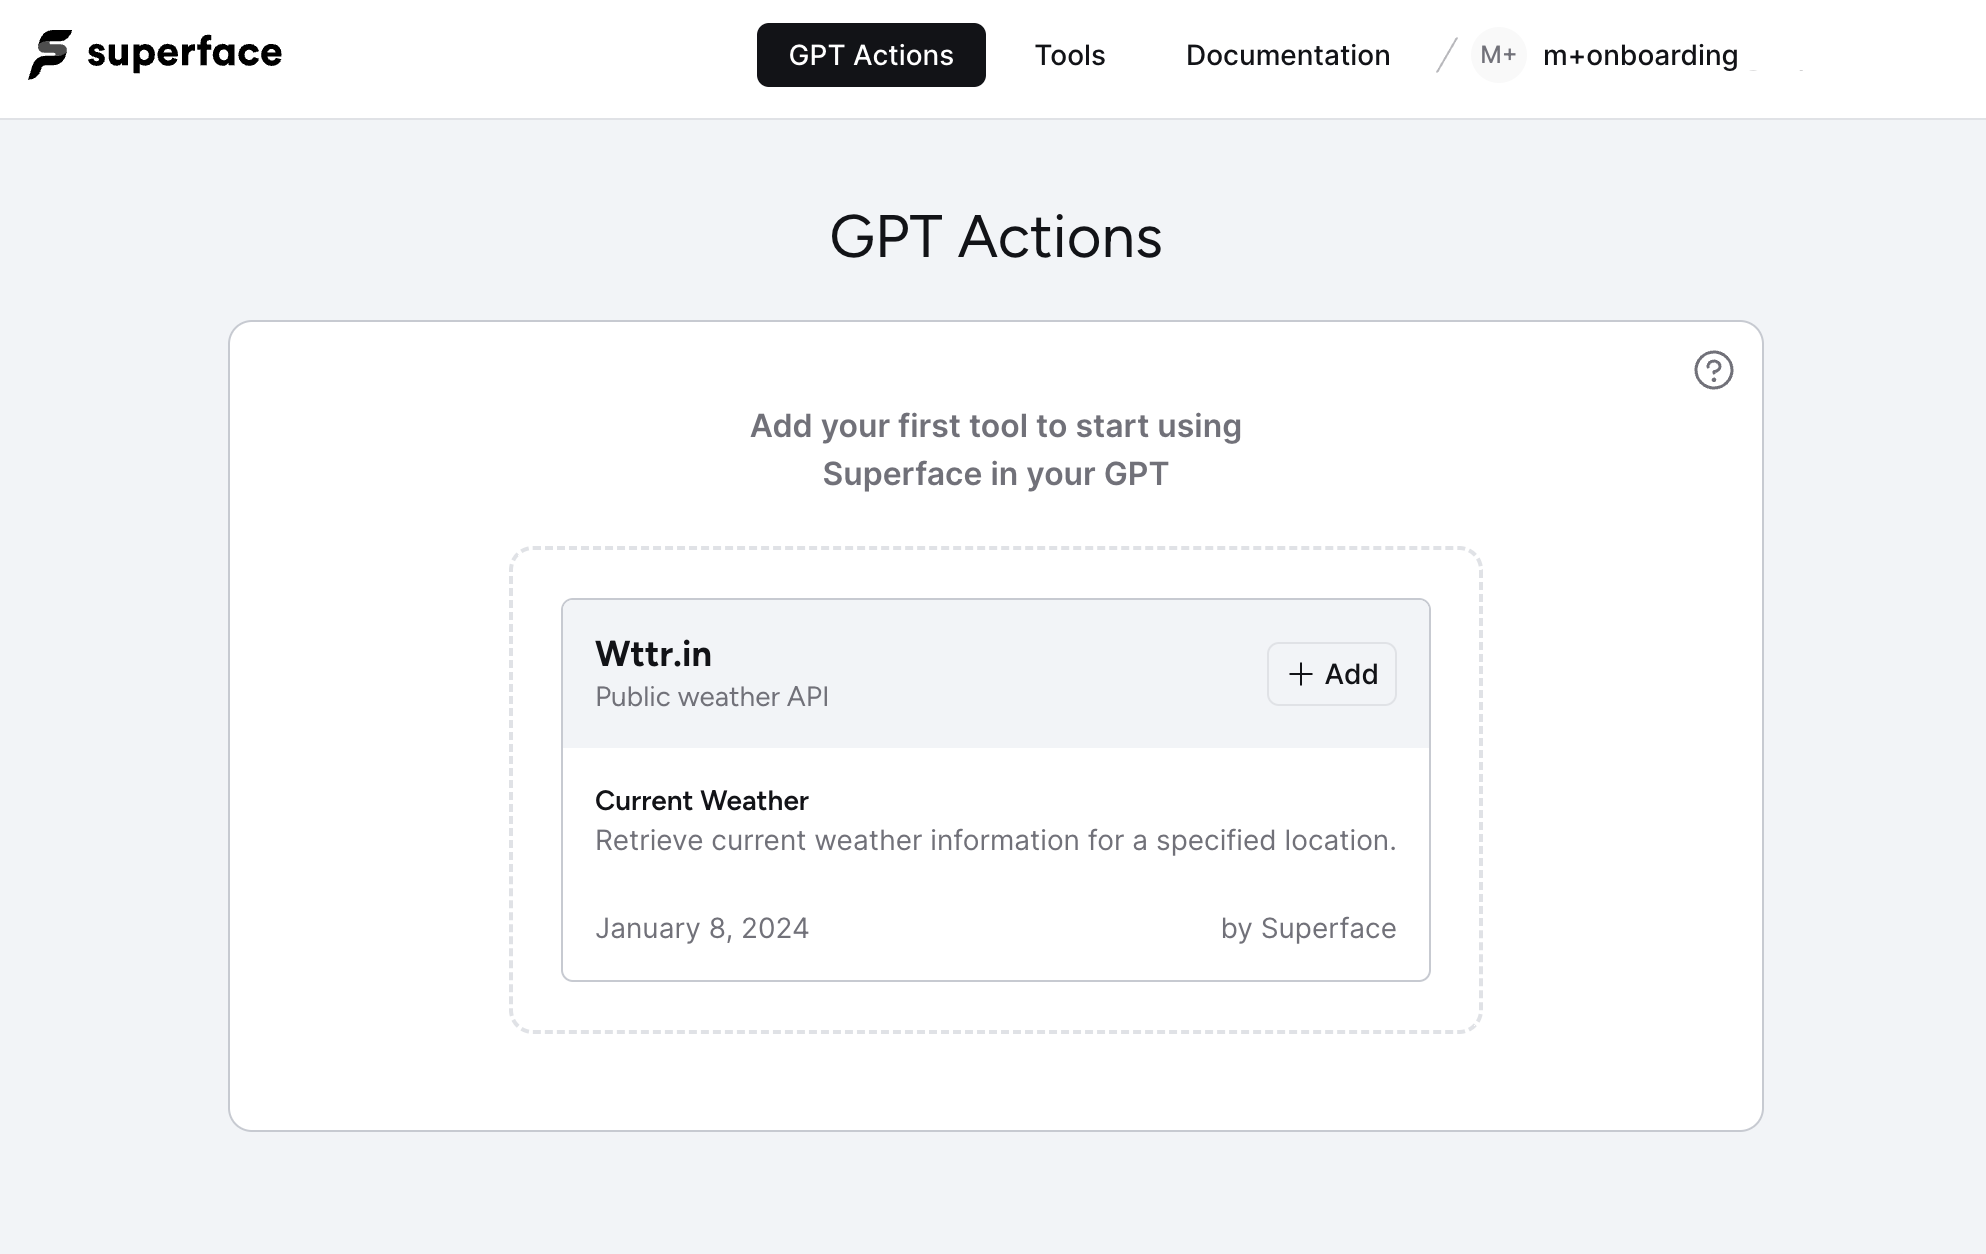
Add a tool
In order to properly connect Superface to your GPT, you will need to have at least one tool installed. To get you moving quickly you can add the Wttr.in tool directly from this page by clicking + Add.
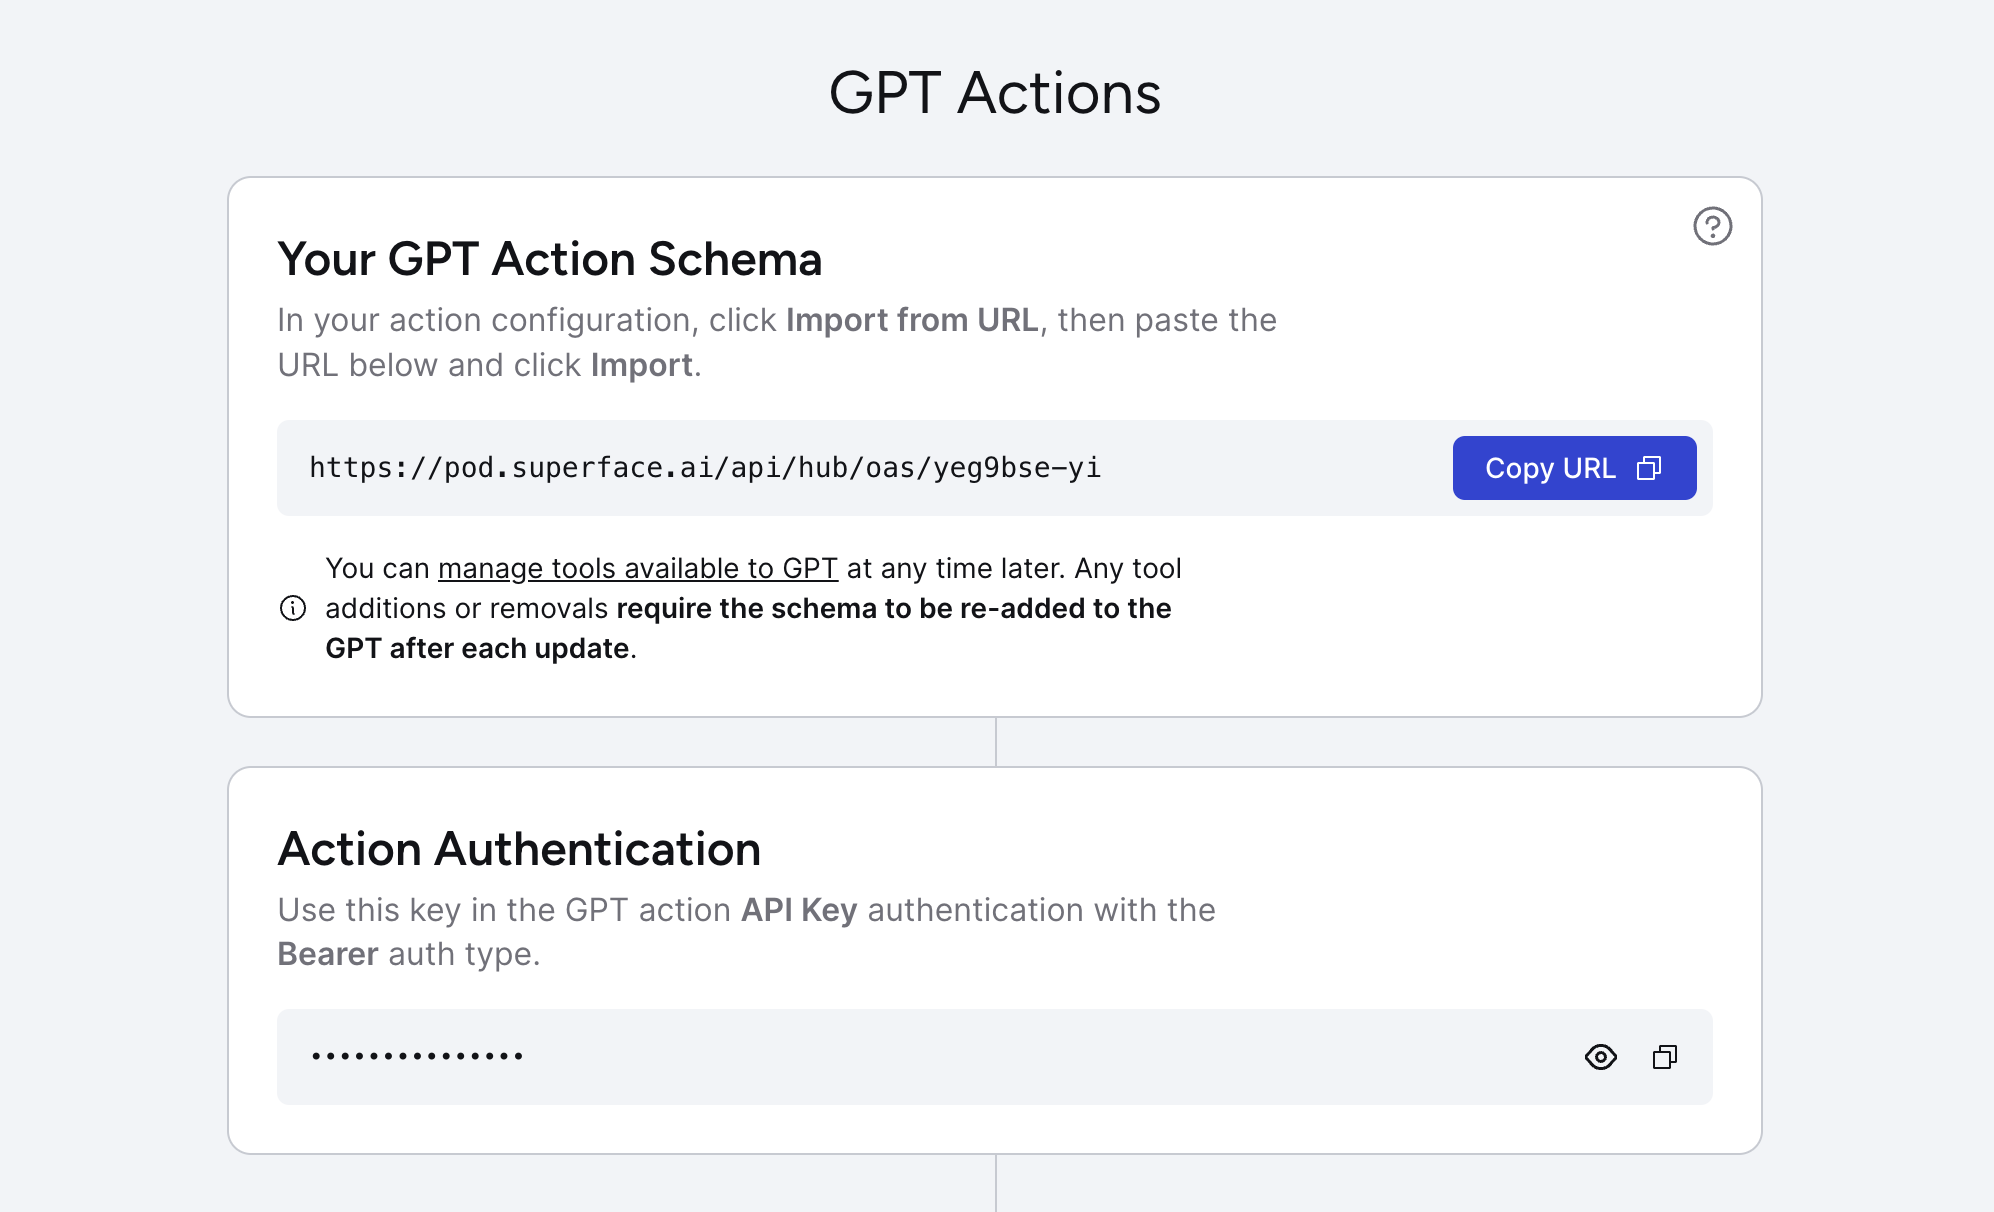
Schema URL & Authentication
Once the tool has been added, the page will refresh with the configuration details you need to connect your OpenAI custom GPT to Superface via an Action.
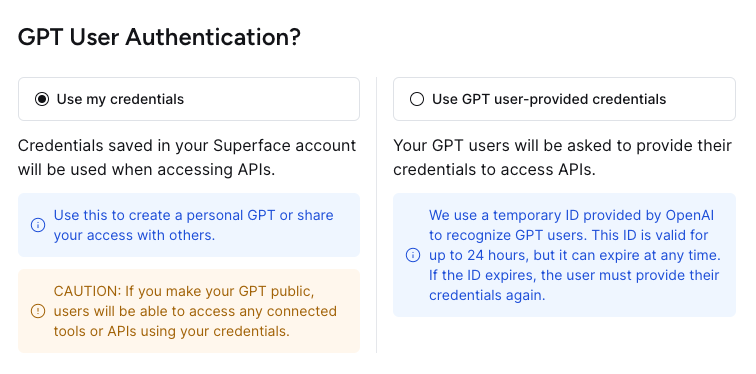
User Authentication
Additionally, you will need to choose the type of authentication you want Superface to use. The default is Use my credentials. You can find out more about using User-provided credentials in the User Authentication guide.
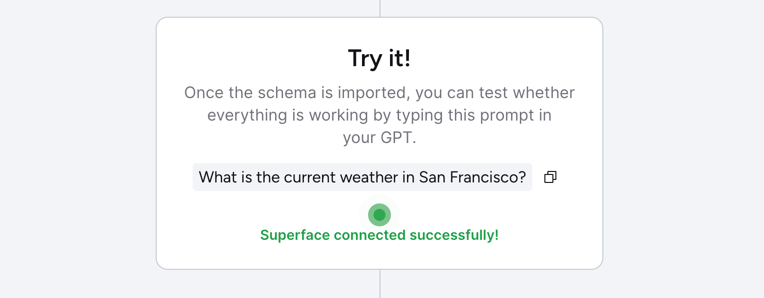
Test your GPT with Superface
At this point you will need to head to the configuration of your custom GPT, and set up your GPT Action. Once this is completed you can test your connection with Superface.
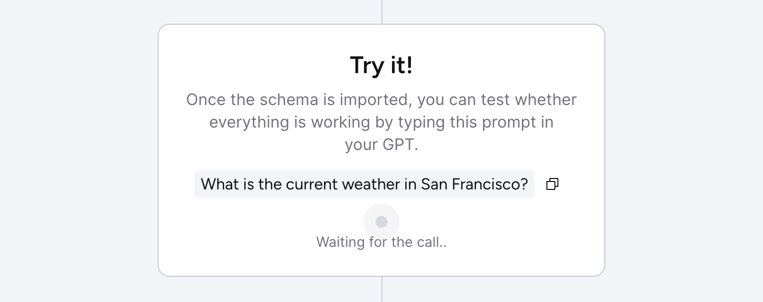
If the configuration is set up correctly, your custom GPT will be able to connect to Superface successfully.
You are now ready to start adding more tools to Superface that can be used via your GPT.
ChatGPT does not automatically sync changes in your Superface account. You must re-import the schema every time you add or remove a tool.