- Published on
Let's build a Google Maps clone with React, Leaflet, and OneSDK
We will build a project similar to Google Maps. The project will cover some basic features of Google Maps, like pinpointing specific locations on the map or planning of routes between locations. Moreover, users can use geocoding to lookup the location of a postal address.
We will use React and React Leaflet on the frontend, and Node.js, Express.js, and Superface OneSDK on the backend.
You can find the final project [on GitHub][final-code].
Front-end: Setting up a map with markers
Let’s start by creating an empty React project (using create-react-app):
-
Open your terminal and navigate to the directory where you want to create your project folder.
-
Run the following command to create a new React project (Replace
<project-name>with the desired name for your project):npx create-react-app <project-name> -
Navigate into the project folder using the following command:
cd <project-name> -
Open the project in your code editor.
-
In the
srcfolder, locate theApp.jsfile. This will be the main file where we will make changes for the project. Remove all code in this file. -
Optionally remove all unnecessary files, such as test files, default logos etc.
-
Run the project:
npm start
Adding the map component
To add a map component, you have many options, like Google Maps or Mapbox, but these are not free. We will use Leaflet, an open-source JavaScript library. With Leaflet, you can easily create interactive maps and add markers, pop-ups, and other types of data visualizations. Leaflet support various providers for map assets, but we will stick with the default, OpenStreetMap.
Leaflet has many official and third party plugins and wrappers. Since we’re using React, we can use React Leaflet which provides components for rendering Leaflet maps in React.
First install leaflet, react-leaflet and leaflet-defaulticon-compatibility. The last package fixes compatibility with Webpack bundler (used by create-react-app) to correctly load images from Leaflet's package.
npm install react-leaflet leaflet leaflet-defaulticon-compatibility
Paste the following code inside App.css file:
.leaflet-container {
  width: 100vw;
  height: 100vh;
}
And finally, add the following code to App.js file and check if it works:
import './App.css';

import 'leaflet/dist/leaflet.css';
import 'leaflet-defaulticon-compatibility/dist/leaflet-defaulticon-compatibility.webpack.css';
import { MapContainer, TileLayer } from 'react-leaflet';
import 'leaflet-defaulticon-compatibility';

function App() {
  return (
    <div className="App">
      <MapContainer center={[51.505, -0.09]} id="mapId" zoom={13}>
        <TileLayer url="https://{s}.tile.openstreetmap.org/{z}/{x}/{y}.png" />
      </MapContainer>
    </div>
  );
}

export default App;
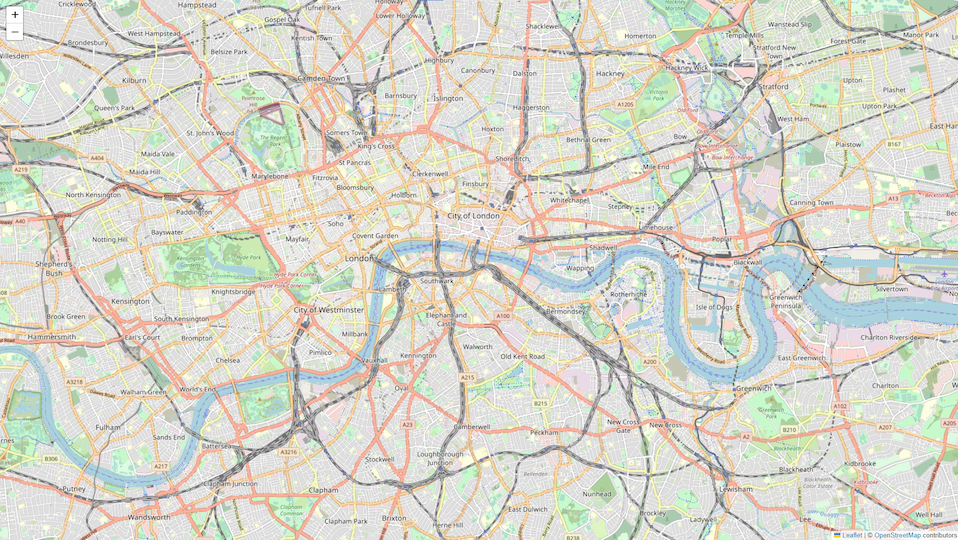
If you setup Leaflet correctly, you should see just a map on your page.

Adding markers on a map
To pinpoint locations on the map, we can use the Marker and Popup components from React Leaflet. The Marker component allows you to add a marker (pin) to a specific location on the map, while the Popup component displays additional information when the marker is clicked or tapped.
Add the following code in App.js:
import './App.css';

import 'leaflet/dist/leaflet.css';
import 'leaflet-defaulticon-compatibility/dist/leaflet-defaulticon-compatibility.webpack.css';
import { MapContainer, TileLayer, Marker, Popup } from 'react-leaflet';
import 'leaflet-defaulticon-compatibility';

function App() {
  const position = [51.505, -0.09];
  return (
    <div className="App">
      <MapContainer center={[51.505, -0.09]} id="mapId" zoom={13}>
        <Marker position={position}>
          <Popup>Hello World</Popup>
        </Marker>
        <TileLayer url="https://{s}.tile.openstreetmap.org/{z}/{x}/{y}.png" />
      </MapContainer>
    </div>
  );
}

export default App;
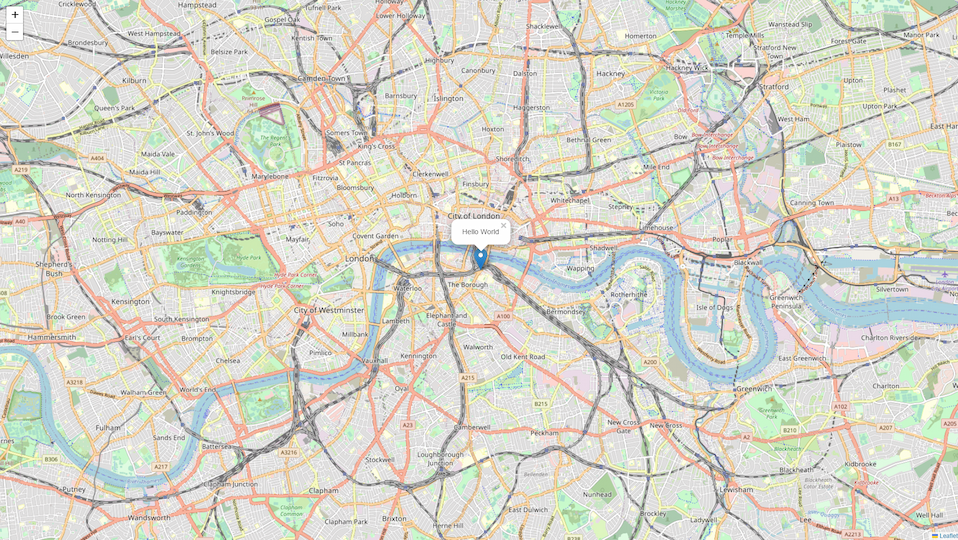
Our map should have a marker and a message will show when we click on it.

Back-end: Pinpointing location entered by the user
Now that we understand how to add markers, we can start by pinpointing an address entered by the user. This will involve using a geocoding API to convert the address into a set of coordinates, which can then be used to place a marker on the map.
We will set up a backend API for the map using Node.js and Express. Once a user enters an address, it is translated to location coordinates using a geocoding API – this part will be handled by Superface. We will use the returned coordinates to place the marker on a map.
Setting up the server project
Within the project folder, create a new folder named server to store the server-side code with empty package.json file.
mkdir server
cd server
npm init -y
Next, install Express.js to handle server-side requests.
npm install express
Finally, create an empty server.js file in this folder.
Implementing geocoding with OneSDK
I've decided to use Superface to handle API integration because it makes the process incredibly simple. With Superface, I don't have to deal with the hassle of API documentation and I can use multiple providers with the same interface. Additionally, the Superface catalog offers many ready-made API use cases, making it a valuable tool to have in your toolkit.
Start by installing Superface OneSDK into your server app:
npm i @superfaceai/one-sdk@2
Then implement a use case. We are going to use Geocoding use case with Nominatim provider. But you can, of course, use a different provider. Copy the example code into your server.js file and make a few changes, so we can send the information we will receive from the user:
const { SuperfaceClient } = require('@superfaceai/one-sdk');
const sdk = new SuperfaceClient();
async function run(loc) {
  // Load the profile
  const profile = await sdk.getProfile('address/geocoding@3.1.2');

  // Use the profile
  const result = await profile.getUseCase('Geocode').perform(
    {
      query: loc,
    },
    {
      provider: 'nominatim',
    }
  );

  // Handle the result
  try {
    const data = result.unwrap();
    console.log(data);
  } catch (error) {
    console.error(error);
  }
}

run('Taj Mahal');
Run this function and the coordinates will be returned:
$ node server.js
{ latitude: '27.1750123', longitude: '78.04209683661315' }
Adding location search
The initial step is to create an input field for the user to enter a location. Upon submission, we will send the location data via a fetch request and use it to determine the coordinates of that location.
Additionally, I am going to use Font Awesome to add icons to our project. This will make it visually appealing and add to its overall design:
cd .. # Go back from server to the main directory with React project
npm install @fortawesome/fontawesome-svg-core @fortawesome/free-solid-svg-icons @fortawesome/free-regular-svg-icons @fortawesome/react-fontawesome@latest
Now we can use the icons in our project. Paste the following code into App.js file:
import './App.css';
import { FontAwesomeIcon } from '@fortawesome/react-fontawesome';
import { faLocationDot } from '@fortawesome/free-solid-svg-icons';

import 'leaflet/dist/leaflet.css';
import 'leaflet-defaulticon-compatibility/dist/leaflet-defaulticon-compatibility.webpack.css';
import { MapContainer, TileLayer, Marker, Popup } from 'react-leaflet';
import 'leaflet-defaulticon-compatibility';

function App() {
  const position = [51.505, -0.09];

  return (
    <div className="App">
      <form className="inputBlock">
        <input
          type="text"
          id="location"
          name="location"
          required
          placeholder="Enter location"
        />
        <button type="submit" className="addloc">
          <FontAwesomeIcon icon={faLocationDot} style={{ color: '#1EE2C7' }} />
        </button>
      </form>
      <MapContainer center={[51.505, -0.09]} id="mapId" zoom={13}>
        <Marker position={position}>
          <Popup>Hello World</Popup>
        </Marker>
        <TileLayer url="https://{s}.tile.openstreetmap.org/{z}/{x}/{y}.png" />
      </MapContainer>
    </div>
  );
}

export default App;
Paste the CSS code below into App.css:
/* Location form */
.inputBlock {
  display: flex;
  justify-content: space-between;
  position: absolute;
  right: 2vw;
  bottom: 2vh;
  padding: 10px;
  z-index: 500;
}

.addloc {
  padding: 5px;
}

.inputBlock input {
  border: 2px solid rgb(41, 38, 38);
  font-size: 1.2rem;
}

.inputBlock button {
  background-color: #282c34;
  font-size: 1.5rem;
  border: 2px black solid;
}
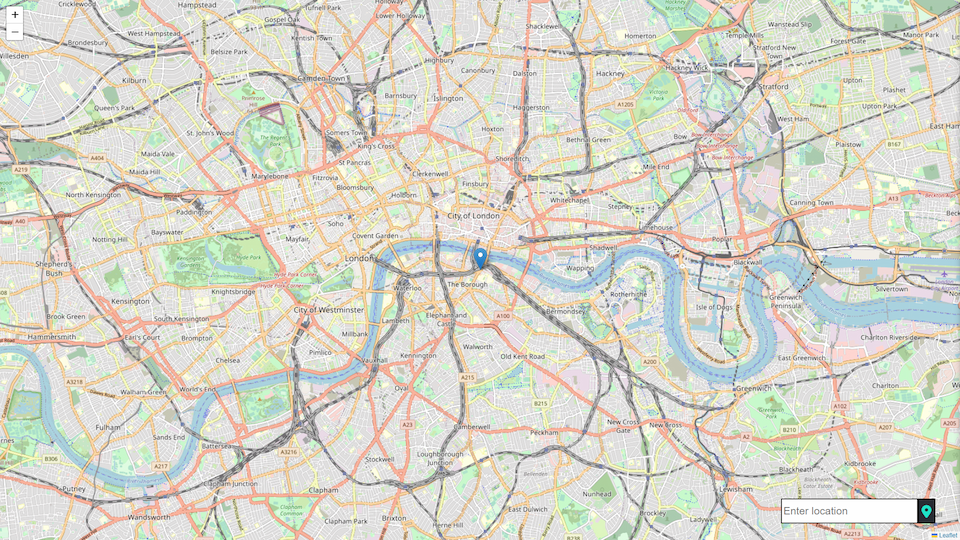
The map should now include a search box in the bottom right corner.

To preserve the entered location and display it on the map as a pinpoint, we need to retrieve its coordinates using the fetch function and store them using the useState hook.
Paste the following code into App.js file:
import './App.css';
import { useState } from 'react';
import { FontAwesomeIcon } from '@fortawesome/react-fontawesome';
import { faLocationDot } from '@fortawesome/free-solid-svg-icons';

import 'leaflet/dist/leaflet.css';
import 'leaflet-defaulticon-compatibility/dist/leaflet-defaulticon-compatibility.webpack.css';
import { MapContainer, TileLayer, Marker, Popup } from 'react-leaflet';
import 'leaflet-defaulticon-compatibility';

function App() {
  const [locationMarkers, setLocationMarkers] = useState([]);

  async function handleMarkerSubmit(event) {
    event.preventDefault();
    const formData = new FormData(event.target);
    const inputLocation = formData.get('location');

    const res = await fetch(
      '/api/geocode?' +
        new URLSearchParams({ location: inputLocation }).toString()
    );
    if (!res.ok) {
      const err = await res.text();
      alert(`Something went wrong.\n${err}`);
    } else {
      const data = await res.json();
      let newLocation = {
        address: data.location,
        lat: data.coordinates.latitude,
        long: data.coordinates.longitude,
      };
      setLocationMarkers((locations) => [...locations, newLocation]);
    }
  }

  return (
    <div className="App">
      <form className="inputBlock" onSubmit={handleMarkerSubmit}>
        <input
          type="text"
          id="location"
          name="location"
          required
          placeholder="Enter location"
        />
        <button type="submit" className="addloc">
          <FontAwesomeIcon icon={faLocationDot} style={{ color: '#1EE2C7' }} />
        </button>
      </form>
      <MapContainer center={[51.505, -0.09]} id="mapId" zoom={13}>
        {locationMarkers.map((loc, key) => {
          return (
            <Marker key={key} position={[loc.lat, loc.long]}>
              <Popup>{loc.address}</Popup>
            </Marker>
          );
        })}
        <TileLayer url="https://{s}.tile.openstreetmap.org/{z}/{x}/{y}.png" />
      </MapContainer>
    </div>
  );
}

export default App;
And the following code into server.js :
const express = require('express');
const app = express();
const { SuperfaceClient } = require('@superfaceai/one-sdk');
const sdk = new SuperfaceClient();
const PORT = 5000;
app.use(express.json());

async function geocodeLocation(loc) {
  // Load the profile
  const profile = await sdk.getProfile('address/geocoding@3.1.2');

  // Use the profile
  const result = await profile.getUseCase('Geocode').perform(
    {
      query: loc,
    },
    {
      provider: 'nominatim',
    }
  );

  // Handle the result
  const data = result.unwrap();
  return data;
}

app.get('/api/geocode', async (req, res) => {
  try {
    const location = req.query.location;
    const coordinates = await geocodeLocation(location);
    res.json({ location, coordinates });
  } catch (error) {
    res.status(500).json(error);
  }
});

app.listen(PORT, () => {
  console.log(`Server listening on ${PORT}`);
});
Now we will need to start the backend server.
cd server/
npm start
To access the backend server from our React application, we can use requests proxying in Create React App. The server runs on port 5000, so we'll add the following line to the top package.json file in our project:
"proxy": "http://localhost:5000"
You may need to restart create-react-app server. After doing that, you should be able to search for locations and see markers on your app.
Routing between two locations
Setting up Routing Machine
To create routes between two locations with Leaflet, we will use a Routing Plugin. This plugin will enable us to display routes on the map.
There are many plugins that we can use. I will go with Leaflet Routing Machine.
First, install the package:
npm install leaflet-routing-machine@3.2.12
Create a RoutingMachine.js file in src folder and copy and paste the below code. This will allow us to create route between the two different locations we pass to waypoints
import L from 'leaflet';
import { createControlComponent } from '@react-leaflet/core';
import 'leaflet-routing-machine';
import 'leaflet-routing-machine/dist/leaflet-routing-machine.css';

const createRoutineMachineLayer = ({ waypoints }) => {
  const instance = L.Routing.control({
    waypoints: waypoints.map(({ latitude, longitude }) =>
      L.latLng(latitude, longitude)
    ),
    draggableWaypoints: false,
  });

  return instance;
};

const RoutingMachine = createControlComponent(createRoutineMachineLayer);

export default RoutingMachine;
Then, we will import this RoutingMachine.js component into our App.js file and provide it with the coordinates of two different locations as props.
Copy and paste the following code in App.js file:
import './App.css';
import { useState, useEffect } from 'react';
import { FontAwesomeIcon } from '@fortawesome/react-fontawesome';
import { faLocationDot, faRoute } from '@fortawesome/free-solid-svg-icons';

import 'leaflet/dist/leaflet.css';
import 'leaflet-defaulticon-compatibility/dist/leaflet-defaulticon-compatibility.webpack.css';
import { MapContainer, TileLayer, Marker, Popup } from 'react-leaflet';
import 'leaflet-defaulticon-compatibility';

import RoutingMachine from './RoutingMachine';

function App() {
  const [locationMarkers, setLocationMarkers] = useState([]);
  const waypoints = [
    {
      latitude: 51.505,
      longitude: -0.09,
    },
    {
      latitude: 51.467,
      longitude: -0.458,
    },
  ];

  async function handleMarkerSubmit(event) {
    event.preventDefault();
    const formData = new FormData(event.target);
    const inputLocation = formData.get('location');

    const res = await fetch(
      '/api/geocode?' +
        new URLSearchParams({ location: inputLocation }).toString()
    );
    if (!res.ok) {
      const err = await res.text();
      alert(`Something went wrong.\n${err}`);
    } else {
      const data = await res.json();
      let newLocation = {
        address: data.location,
        lat: data.coordinates.latitude,
        long: data.coordinates.longitude,
      };
      setLocationMarkers((locations) => [...locations, newLocation]);
    }
  }

  return (
    <div className="App">
      <form className="inputBlock" onSubmit={handleMarkerSubmit}>
        <input
          type="text"
          id="location"
          name="location"
          required
          placeholder="Enter location"
        />
        <button type="submit" className="addloc">
          <FontAwesomeIcon icon={faLocationDot} style={{ color: '#1EE2C7' }} />
        </button>
      </form>
      <MapContainer center={[51.505, -0.09]} id="mapId" zoom={13}>
        {locationMarkers.map((loc, key) => {
          return (
            <Marker key={key} position={[loc.lat, loc.long]}>
              <Popup>{loc.address}</Popup>
            </Marker>
          );
        })}
        <TileLayer url="https://{s}.tile.openstreetmap.org/{z}/{x}/{y}.png" />
        {waypoints ? <RoutingMachine waypoints={waypoints} /> : ''}
      </MapContainer>
    </div>
  );
}

export default App;
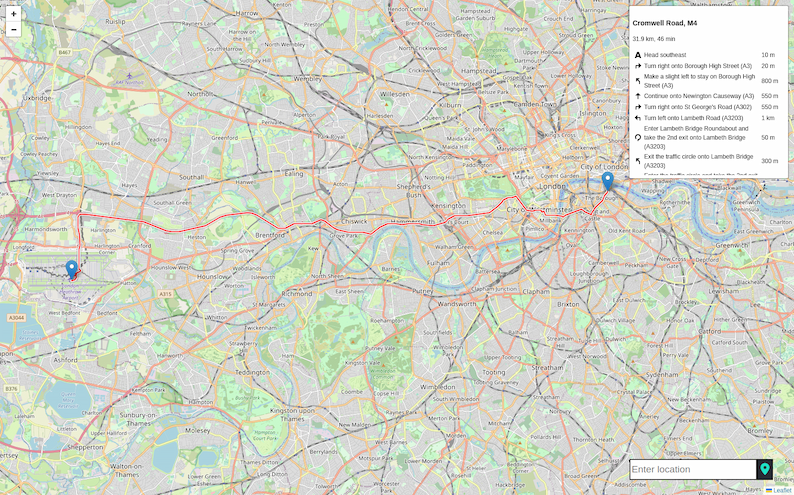
With Routing Machine added, you should see a route between two static waypoints.

Routing inputs
We will add input fields for the user to enter two distinct locations, the starting point and the final destination. Then we will ask for coordinates from the server using fetch and pass them as properties to the RoutingMachine.js component. We will also create another route in the server.js file to handle requests for calculating the route between the two locations.
Copy and paste the code in App.js:
import './App.css';
import { useState, useEffect } from 'react';
import { FontAwesomeIcon } from '@fortawesome/react-fontawesome';
import { faLocationDot, faRoute } from '@fortawesome/free-solid-svg-icons';

import 'leaflet/dist/leaflet.css';
import 'leaflet-defaulticon-compatibility/dist/leaflet-defaulticon-compatibility.webpack.css';
import { MapContainer, TileLayer, Marker, Popup } from 'react-leaflet';
import 'leaflet-defaulticon-compatibility';

import RoutingMachine from './RoutingMachine';

function App() {
  const [locationMarkers, setLocationMarkers] = useState([]);
  const [waypoints, setWaypoints] = useState();
  const [showRoutingForm, setFormView] = useState(false);

  useEffect(() => {}, [waypoints]);

  async function handleMarkerSubmit(event) {
    event.preventDefault();
    const formData = new FormData(event.target);
    const inputLocation = formData.get('location');

    const res = await fetch(
      '/api/geocode?' +
        new URLSearchParams({ location: inputLocation }).toString()
    );
    if (!res.ok) {
      const err = await res.text();
      alert(`Something went wrong.\n${err}`);
    } else {
      const data = await res.json();
      let newLocation = {
        address: data.location,
        lat: data.coordinates.latitude,
        long: data.coordinates.longitude,
      };
      setLocationMarkers((locations) => [...locations, newLocation]);
    }
  }

  async function handleRouteSubmit(event) {
    event.preventDefault();
    // Reset previous waypoints
    if (waypoints) {
      setWaypoints();
    }
    // Hide the form
    setFormView(false);

    const formData = new FormData(event.target);
    const locations = formData.getAll('location');
    const res = await fetch('/api/route', {
      method: 'POST',
      headers: {
        Accept: 'application/json',
        'Content-Type': 'application/json;charset=UTF-8',
      },
      body: JSON.stringify({ locations }),
    });
    if (!res.ok) {
      const err = await res.text();
      alert(`Something went wrong.\n${err}`);
    } else {
      const data = await res.json();
      setWaypoints(data.waypoints);
    }
  }

  return (
    <div className="App">
      <form className="inputBlock" onSubmit={handleMarkerSubmit}>
        <input
          type="text"
          id="location"
          name="location"
          required
          placeholder="Enter location"
        />
        <button type="submit" className="addloc">
          <FontAwesomeIcon icon={faLocationDot} style={{ color: '#1EE2C7' }} />
        </button>
      </form>
      <div className="routeBlock">
        <div className="addRoutes">
          {showRoutingForm && (
            <form onSubmit={handleRouteSubmit}>
              <div className="posOne">
                <input
                  type="text"
                  name="location"
                  required
                  placeholder="Staring Point"
                />
              </div>
              <div className="posTwo">
                <input
                  type="text"
                  name="location"
                  required
                  placeholder="End Point"
                />
              </div>
              <button className="addloc">Find Path</button>
            </form>
          )}
          <FontAwesomeIcon
            icon={faRoute}
            style={{ color: '#1EE2C7' }}
            onClick={() => {
              setFormView((showRoutingForm) => !showRoutingForm);
            }}
          />
        </div>
      </div>
      <MapContainer center={[31.505, 70.09]} id="mapId" zoom={4}>
        {locationMarkers.map((loc, key) => {
          return (
            <Marker key={key} position={[loc.lat, loc.long]}>
              <Popup>{loc.address}</Popup>
            </Marker>
          );
        })}
        <TileLayer url="https://{s}.tile.openstreetmap.org/{z}/{x}/{y}.png" />
        {waypoints ? <RoutingMachine waypoints={waypoints} /> : ''}
      </MapContainer>
    </div>
  );
}

export default App;
Add the below CSS code in App.css:
/* Routing form */
.routeBlock {
  position: absolute;
  left: 0.5vw;
  bottom: 2vh;
  z-index: 500;
  padding: 5px;
  font-size: 2rem;
  border: 2px solid rgb(41, 38, 38);
  background-color: #282c34;
}

.routeBlock input {
  font-size: 1rem;
}
And here’s the final version of server.js file:
const express = require('express');
const app = express();
const { SuperfaceClient } = require('@superfaceai/one-sdk');
const sdk = new SuperfaceClient();
const PORT = 5000;
app.use(express.json());

async function geocodeLocation(loc) {
  // Load the profile
  const profile = await sdk.getProfile('address/geocoding@3.1.2');

  // Use the profile
  const result = await profile.getUseCase('Geocode').perform(
    {
      query: loc,
    },
    {
      provider: 'nominatim',
    }
  );

  // Handle the result
  const data = result.unwrap();
  return data;
}

app.get('/api/geocode', async (req, res) => {
  try {
    const location = req.query.location;
    const coordinates = await geocodeLocation(location);
    res.json({ location, coordinates });
  } catch (error) {
    res.status(500).json(error);
  }
});

app.post('/api/route', async (req, res) => {
  try {
    const locations = req.body.locations;
    if (locations.length !== 2) {
      res.status(422).json({ error: 'Expected 2 waypoints' });
      return;
    }
    const waypoints = await Promise.all(
      locations.map((location) => geocodeLocation(location))
    );
    res.json({ waypoints });
  } catch (error) {
    res.status(500).json(error);
  }
});

app.listen(PORT, () => {
  console.log(`Server listening on ${PORT}`);
});
google-maps-clone
├── package.json
├── package-lock.json
├── public
│   └── index.html
├── README.md
├── server
│   ├── package.json
│   ├── package-lock.json
│   └── server.js
└── src
    ├── App.css
    ├── App.js
    ├── index.css
    ├── index.js
    └── RoutingMachine.js
Conclusion
In this tutorial, we have learned how to create a Google Maps-like application using Leaflet and React. We've utilized Geolocation API to identify location coordinates and place markers, as well as creating a route between two different locations. You can find the final project [on GitHub][https://github.com/superfaceai/google-maps-clone].
There are many more features that can be added to enhance this map project. For example real-time tracking of the user's location, integrating voice assistance for routing, using IP geolocation API, customizing marker icons, and much more.