

Large Language Models (LLMs) like GPT-3 are useful to simplify routine tasks. For example, we can take unstructured data, like a job applicant's resume in PDF, and turn them into structured data and fill them into our Applicant Tracking System (ATS) like Greenhouse or Workable.
In this article, we will show you a Node.js application which does that. But while GPT-3 simplifies routine data entry jobs, as developers we still need to connect all the respective APIs to download the applicant's CV, get text from the PDF, and put data to the ATS. Luckily, Superface gets us rid of this routine API wiring. We provide a unified interface across many API providers. Switching from, for example, Workable to Breezy HR, is a one line change.
Let's check what steps this application does:
- Loads a CV of a candidate who applied for a given job from an Applicant Tracking System (ATS), like Workable or Greenhouse.
- Converts the CV to text and parses the text into machine-readable data.
- Updates the candidate in the ATS with the data obtained from the CV.
You can find the complete application in the CV Analyzer repository. It uses the following packages:
- @superfaceai/one-sdk - Superface OneSDK is used to integrate with ATS, OpenAI and Cloudmersive SaaS providers.
- node-fetch - NodeFetch is used to fetch the CV document.
- dotenv - dotenv is used to load environment variables.
- inquirer - Inquirer.js is used to build interactive user interface.
We also rely on these use cases from Superface Catalog:
In this demo we use Workable as ATS, Cloudmersive to convert a candidate's CV to plain text, and OpenAI provider for conversion of CV to structured data. But you are not limited to just this three providers. For ATS use cases you can use also Breezy HR, Greenhouse and many others.
Setting up the application
-
Clone the app repository and enter its directory.
git clone git@github.com:superfaceai/cv-analyzer.git cd cv-analyzer -
Install dependencies.
npm install -
Create accounts (if you do not have them already) for the providers:
- Workable offers 15 days free trial. A work e-mail address is required to create the account.
- Cloudmersive has a free tier limited to 800 requests per month.
- OpenAI offers a free trial with $18 in free credit usable during the first 3 months.
-
Copy the example
.envfile.cp .env.example .env -
Set credentials and integration parameters for the providers in the
.envfile.- Get Workable Access Token and Subdomain.
- Create Cloudmersive Free Tier Key.
- Create OpenAI Secret API Key.
-
Create a job position and add new candidate in Workable ATS.
-
Start the app.
npm start
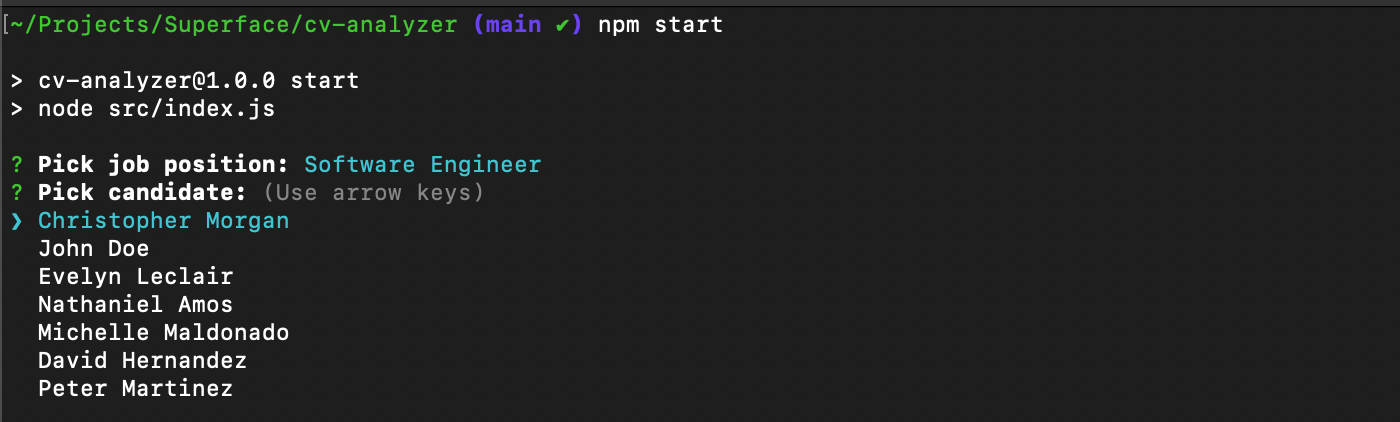
Once the application starts, it will show you a list of candidates. When you pick one, it will update candidate's entry with data parsed from their CV.
How the application works
The main flow of the application is in the src/index.js file, which calls use cases defined in src/use_cases.js file.
Selecting the candidate and getting its CV
First we list open job positions and candidates for the selected position. This is handled with the List Jobs use case; once the user picks a job position, we use List Candidates use case with the respective ID of the job position:
exports.listCandidates = async (sdk, providerOptions, jobId) => {
  const listCandidatesProfile = await sdk.getProfile(
    'recruitment/list-candidates@1.0.0'
  );
  const listCandidatesResult = await listCandidatesProfile
    .getUseCase('ListCandidates')
    .perform(
      {
        jobId,
      },
      providerOptions
    );
  return listCandidatesResult.unwrap().candidates;
};
We take the ID of the selected candidate and use the Get CV use case to obtain the URL of a document with candidate's resume (typically that's a PDF, but the ATS may accept other formats as well):
exports.getCVUrl = async (sdk, providerOptions, candidateId) => {
  const getCVProfile = await sdk.getProfile('recruitment/get-cv@1.0.0');
  const getCVResult = await getCVProfile.getUseCase('GetCV').perform(
    {
      candidateId,
    },
    providerOptions
  );
  return getCVResult.unwrap().cv.documentUrl;
};
Converting CV to text
Now we know where the candidate's CV can be downloaded, but we need to extract the text from it somehow. We use Convert Document to Text use case for that – we fetch the document and upload it to the conversion provider (Cloudmersive in this example) and get a plain text in return.
exports.convertCVToText = async (sdk, providerOptions, cvDocumentUrl) => {
  const docToTextProfile = await sdk.getProfile(
    'file-conversion/doc-to-text@1.0.0'
  );

  const fetchDocumentResponse = await fetch(cvDocumentUrl);

  if (!fetchDocumentResponse.body) {
    console.error('Failed to fetch CV document.');
    return;
  }

  const result = await docToTextProfile
    .getUseCase('ConvertDocumentToText')
    .perform(
      {
        fileName: 'cv.pdf',
        content: BinaryData.fromStream(fetchDocumentResponse.body),
      },
      providerOptions
    );

  return result.unwrap().text;
};
Extracting structured data
Now it's time for some AI magic! We use OpenAI's GPT-3 model through the Text Completion use case. We provide the model with a prompt explaining we need particular data returned as JSON:
exports.analyzeCV = async (sdk, providerOptions, cvText) => {
  try {
    const generateTextProfile = await sdk.getProfile('ai/generate-text@1.0.0');

    const promptCommand = `Parse following job applicant resume and return json object with properties
    {
      "firstName", "lastName", "address", "phone",
      "education":
      [{"school", "fieldOfStudy", "studiedFrom_ISO8601":"YYYY-MM-DD", "studiedTill_ISO8601":"YYYY-MM-DD"}],
    "workHistory":
      [{"company", "position", "summary", "workedFrom_ISO8601:"YYYY-MM-DD"", "workedTill_ISO8601":"YYYY-MM-DD"}]
    }. `;

    const result = await generateTextProfile.getUseCase('CompleteText').perform(
      {
        prompt: promptCommand + cvText,
        creativity: 0.8,
        approxMaxWords: 1000,
        model: 'large',
      },
      providerOptions
    );

    analyzeCVOutcome = result.unwrap();
  } catch (error) {
    console.error('Failed to analyze CV.', error);
  }
  // ...
};
If the analysis goes well and the model “completes” our prompt, we turn the returned completion to JSON:
const parsedCV = JSON.parse(analyzeCVOutcome.completions[0]);
const mappedCV = {
  ...parsedCV,
  education: parsedCV.education?.map((school) => {
    return {
      school: school.school,
      degree: school.degree,
      fieldOfStudy: school.fieldOfStudy,
      startedAt: school.studiedFrom_ISO8601,
      endedAt: school.studiedTill_ISO8601,
    };
  }),
  workHistory: parsedCV.workHistory?.map((work) => {
    // ...
  }),
};

return mappedCV;
Update the candidate data
Now that we have a JSON with structured data extracted from the CV, we can send the data back to the ATS to update the candidate's data using the Update Candidate use case:
exports.updateCandidate = async (sdk, providerOptions, candidate) => {
  const profile = await sdk.getProfile('recruitment/update-candidate@1.0.0');

  const result = await profile
    .getUseCase('UpdateCandidate')
    .perform(candidate, providerOptions);

  result.unwrap();

  return true;
};
Using another ATS?
If you take a look at the code, there aren't any mentions of Workable, Cloudmersive or OpenAI. That's because the use cases are designed in provider-neutral way. In case of ATS, we use a unified terminology, so if you need to use another ATS, you don't need to rewrite the whole application. Instead, you can change atsProviderOptions in src/index.js file:
// Options for Workable
const atsProviderOptions = {
  provider: 'workable',
  parameters: {
    SUBDOMAIN: process.env.WORKABLE_SUBDOMAIN,
  },
  security: {
    bearer_token: {
      token: process.env.WORKABLE_TOKEN,
    },
  },
};
And if you'd like to use, for example, Breezy HR, set atsProviderOptions like this:
// Options for Breezy HR
const atsProviderOptions = {
  provider: 'breezy-hr',
  parameters: {
    COMPANY_ID: process.env.BREEZY_HR_COMPANY_ID,
    ACCESS_TOKEN: process.env.BREEZY_HR_ACCESS_TOKEN,
  },
};
Next steps
In this demo application we've used 6 different API use cases from 3 different API providers, without ever looking at the API docs. That's the advantage of Superface.
Do you need to integrate Applicant Tracking Systems like Workable, Lever, or SAP SuccessFactors? Check out our Applicant Tracking Systems integrations. And don't miss other integrations in the Superface catalog.